Part 2 of 2 - check out WHY you should document your challenge as well. The two posts will serve as the basis of my Documentation Workshop at the Berlin event, so I encourage anyone else interested in documentation to add to these posts and use them to communicate the importance of documentation to others!
There are many different aspects of your challenge to document, and different tools to use to get your message across.
First of all, what should you be documenting?
temperature and rainfall levels during your workshop? the colour of the pens you used? how comfortable the chairs were?
hmm, probably not. But this depends on the context - there may be a project out there where this information may indeed be useful! Depending on whether your challenge is focused on a discussion, a scientific experiment, a physical object, a whole industry, or digital artefacts, you are going to document different things.
So I can’t give you a definite check list, but the guiding principles should be:
- to empower others to replicate your work for their own needs and in their own context
- to note your assumptions that may have influenced your decisions
- to capture the knowledge produced in the project’s development.
What do I mean by this? let’s look at an example.
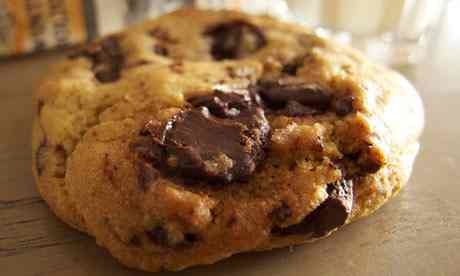
Yesterday I wanted to make some chocolate chip cookies, but I don’t have a trusted cookie recipe book, a website or a single recipe that I know will provide the best cookies for me.
So instead, I sought out Felicity Cloake’s series ‘How to cook the perfect…’ on the Guardian website, where she takes on a different food classic every week.

Want cookies? here you go.
What I like about her approach is that she doesn’t just give me a list of ingredients and instructions - rather she links to, tests, and analyzes multiple recipes and approaches, reports back on her methods, what worked and what didn’t, and then gives justification for her decisions in putting together her final recipe.
Building on the work of others, adapting their work to your needs, and sharing your improvements. It’s just the open source process, but you end up with cookies! Delicious.
I really like what Manu said when I interviewed her at POC21 about her role as a materials expert for open source hardware projects:
when you’re talking about sustainability, it’s a way of thinking, a way of designing, and not just changing materials… my main asset here is to help them to… to not say, “this is the right material, use this or use that” but to give them parameters so they can understand the logic behind choosing one material instead of another.
This is exactly what makes great documentation great - it’s the idea of teaching someone to fish, rather than giving them a fish. (Or, in our case, teaching someone to develop an aquaponic system to fish sustainably and in balance with an ecosystem.)
And this is what makes Felicity Cloake’s articles a wonderful way to learn to cook classic meals - they’re accessible to beginners, but they provide useful details for more experienced cooks. In this case, she explained why she went for a low-gluten flour for her recipe:
Both bread and cake flour, according to McGee on Food and Cooking “produce doughs and batters that spread less” – giving a puffier, chewier result which, in Wareing’s case, even verges on the crumbly. I’m not sure about chewy, frankly: as a Brit, I like a bit of crunch to the edges of my cookie, which means allowing a little bit of spread in order to give a slightly thinner result. Plain flour it is.
This information explained not just WHAT type of flour she used, but WHY she used it - plain flour was simply a matter of personal preference rather than a critical ingredient on which success or failure depends.
And while I agree with Felicity’s opinion most of the time, I must say my cookie preferences are more American than hers - so I chose a higher-gluten flour, for a chewier result, and my cookies turned out PERFECT. (Perfect for me, that is).
With that in mind, what tools or media do we have available to document our non-edible projects?
The key thing to remember is not to be a perfectionist, and that it is much, much more important to have messy, incomplete documentation than it is to have no documentation at all, because you’re still trying to make it pretty or ‘finished’ before you publish. Just dump whatever you have online, make sure it’s accessible, and then start to make it pretty if you like. That way if you get distracted or run out of time to ‘finish’ the documentation, the basic information is still available.

This post was pretty sloppy when I first posted it, and I’ve already improved it 5 times… if you check the number of edits at the top of the post now, I’m sure that number will be much higher. It’s ok to have things in a state of constant beta!
Documentation Methods
Text
The simplest and most valuable way to document is usually with text.
Text is easily searchable (i.e. for keywords, with search engines), it can be translated for different audiences, it can be simultaneously co-created, it is easily editable, and it’s lightweight - people with poor connections or limited data can still easily access your documentation.
During your session, participants can simultaneously co-create documentation using Etherpad.
To create a new shared pad, just type in the address 'pad.oscedays.org/p/'followed by the name of your session, all lower case, and with dashes instead of spaces. So for this ‘Challenge’ for example, I would type:
pad.oscedays.org/p/how-can-i-document-my-challenge
into my browser’s address bar, and a new pad would be created for me.
Now, before you start your session, you just have three small tasks:
-
make sure that you have at least one person responsible for taking notes
-
make sure that your group knows where the pad is (write the URL on a whiteboard or on a visible piece of paper, and announce it to the group)
-
make sure the world knows where the pad is - just in case your local event gets hit by a giant meteorite from outer space before you have the chance to document everything, provide the world with the link to the pad so they can learn from your session!
IMPORTANT: of course you don’t have to document in English! we all have access to online translation tools, so just get the info written down and online, however it is easiest for you.
Add the link to the pad on the OSCEdays forum, on your own website, on your facebook event, or wherever you are announcing and communicating your challenge.
A real-time tool like Etherpad is good for documenting during your challenge, but a hurried scramble of notes is difficult for newcomers to follow. As soon as possible after you have finished your session, workshop, or whatever activity you undertake, you will need to make those notes understandable and accessible to others.
This means structuring the notes, and adding context.
Structuring is simply a case of asking “what information do people need to understand this project, and/or to take it further or get involved?” and then working out the order in which this information should be communicated.
Adding context means providing the information that will allow people to catch up on existing knowledge around your challenge, so for example you should link to project websites or wikipedia any time other projects and concepts are mentioned, so everyone can get up to speed with the conversation if they’re unfamiliar with a term.
It also means filling in more information about the context of the session, project or activity that you are documenting, eg:
- WHAT is the goal of the overall project/challenge?
- WHAT was the goal of this session?
- WHERE and WHEN did it take place?
- HOW did you approach or structure your session?
- WHO was taking part?
- WHAT did you learn?
- WHAT are the next steps?
- WHAT input, resources or tasks are needed?
- HOW can people get involved?
Bear in mind that many of these WHOs, HOWs, WHATs, WHEREs amd WHENs should often be accompanied with a “WHY?” - remember, you want to empower and involve people, not just list stuff.
My suggestion is that whatever other formats and media you decide to use to document your project, it should be in combination with text, even if the text is just a few bullet points and links. Adding at least one image is a good idea, and it can help to engage people on social media.

The OSCEdays community forum is a good place to document your project, as we have a network of fantastic people who can help you out. However, we don’t require that you use our platform - by all means, if you have a project website, or a more suitable place, document your OSCEdays challenge there - but please add a little note on this forum with a link to the documentation, so that we can find it, and our community can learn from and contribute to your project.
A note on Participants:
Only take photos and record information on participants if they are okay with it!
It is worthwhile recording the participants in a discussion, particularly to enable the converstion to continue online. Having a photo of the participants with their names and maybe their websites or twitter accounts etc is useful to remind participants who else was involved, and to help people get connected online later.
As well as this, for people who weren’t at the event or involved in your challenge, it’s useful to know who to get in touch with to ask questions or give suggestions about the challenge.
Who took part?
Did they have a specific role, focus or perspective in the challenge?
Why are they taking part? What do/did they want to learn from this challenge?
How can people find them online?
Other documentation media:
Photos
Particularly useful for documenting physical objects and parts, or showing the space and participants involved in a session.
Did you use flipcharts, diagrams or whiteboards during the session? Quick, get a clear photo of them before the information is lost forever!
A nice image helps to generate interest on social media too, so you have a higher chance of your documentation reaching the right people.
Diagrams
Useful for communicating a complex system - it doesn’t have to be pretty, it just has to be clear. You can just scrawl out a diagram during your session - this is a diagram I drew using my betabook (one of @jaycousins’ projects) when we were planning website improvements:

I then choose to clean it up using Inkscape for the documentation of the session, but the original drawing would have worked almost as well.
Video
Not so useful for details and specifics, but excellent for communicating ‘the vibe’ and building trust in the people behind a project. Video also works well when you want to demonstrate a moving part of some kind.
A video can be really fun and entertaining, but it’s difficult to do video well, and it’s not generally a very flexible medium (e.g. it’s a lot more difficult to fix and improve small issues in a video than it is with text). The hard part of video is actually editing it!
Only shoot video if you have planned for someone to edit it, or you can capture everything in one take. Try to shoot with a particular purpose in mind, rather than just scanning the area with your camera and hoping to capture something good.
Audio
The advantage of audio is that you can very quickly and easily capture spoken information - some people might not have the time, interest or the energy to write down their thoughts, but it’s very easy to have a conversation with somebody and record it.
At POC21, @unteem and I were involved in a discussion about the direction of OSCEdays which I thought would be useful for other people from our community, so I recorded and transcribed it so the information wasn’t lost.
The hard work comes when you need to transcribe and edit a recorded conversation. So just like with video, have a plan for transcribing and editing before you record. My current transcription method is to get a rough transcription using the IBM Watson demo (haven’t found a F/LOSS speech-to-text solution yet ![]() ) and then fix up the transcription using oTranscribe. Or if I have money but no time, I use Rev ($1/min).
) and then fix up the transcription using oTranscribe. Or if I have money but no time, I use Rev ($1/min).
Document your hardware project - Wikifab
While there are other open hardware documentation platforms available, few of them are open source, hardly any export to open standards or have the long-term stewardship of the commons as a guiding principle. So if you want to document a hardware project, I would highly recommend Wikifab. Check out @clement 's introduction here, and get in touch with him if you need any help:
Document your software/digital project - Git
Of course with software code and some other text-based files, the distributed version control software Git is literally purpose-made for open source collaboration. We don’t have our own OSCEdays Gitlab repository set up yet, so feel free to host your code wherever you like, but leave a link in your challenge description on this forum so that we can find it! For my projects I like Gitlab, because it is open source, easy to use, ethically and transparently operated, and I can switch to self-hosted whenever I like.